
Order of Work
• Lay out and cut the pins
• Lay out and cut the tails
• Dado for the shelves
• Assemble case
• Make the drawer
• Sand and finish
This display cabinet may be relatively small in stature, but its design incorporates one of the pinnacles of the woodworker’s craft: hand-cut dovetail joints. For many woodworkers, the hand-cut dovetail is seen as a rite of passage, and for good reason. The joint requires a raft of hand skills, including careful layout, accurate sawing, and skillful chisel work. While the joint may seem intimidating at first, with a little practice and the right tools (See page 40), you’ll soon be able to add this feather to your cap.
To build the cabinet as shown, you’ll need to cut two kinds of dovetails. The corners of the cabinet are joined with through dovetails—those visible on both outside faces of the joint. The drawer front is attached to the drawer sides with half-blind dovetails, which show only on the side of the drawer, not its face. The techniques used for cutting both forms of the joint are similar, but with a few key differences, as I’ll explain.
Straightforward construction with subtle curves
هذه القصة مأخوذة من طبعة February - March 2021 من Woodcraft Magazine.
ابدأ النسخة التجريبية المجانية من Magzter GOLD لمدة 7 أيام للوصول إلى آلاف القصص المتميزة المنسقة وأكثر من 9,000 مجلة وصحيفة.
بالفعل مشترك ? تسجيل الدخول
هذه القصة مأخوذة من طبعة February - March 2021 من Woodcraft Magazine.
ابدأ النسخة التجريبية المجانية من Magzter GOLD لمدة 7 أيام للوصول إلى آلاف القصص المتميزة المنسقة وأكثر من 9,000 مجلة وصحيفة.
بالفعل مشترك? تسجيل الدخول
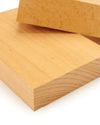
Beech
Plain looks, but a solid performer

Working with PLASTIC LAMINATE
Adding a durable, smooth, and colorful surface to your work

High-Tech ROUTER TABLE
A state-of-the-art shop essential

Albers-Inspired NESTING TABLES
A colorful array of Bauhaus utility

Desktop ORGANIZERS
Mini modules for your modern workspace
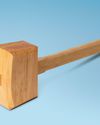
Joiner's MALLET
A hard-hitting shop hammer
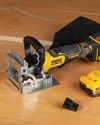
Battery-backed biscuiting
DeWalt 20V Max XR Biscuit Joiner

Crosscut SLED
A basic build of a crucial table saw accessory
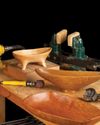
Power-carving BOWLS
Tools and techniques for sculpting

Library STEPS
Mitered box joints give rise to an updated classic