
Tools and materials
Timber: 3 x 1.8m x 44 x 22 Pine Par (see Fig 1. for the cutting list)
Cordless drill
Various wood drills
Cordless screwdriver
Tape measure
Steel rule
Handsaw (fine toothed)
Adjustable square
Depth marking gauge
12 and 18mm chisels
Wood rasp, medium cut
Rubber mallet
Wood clamps (4)
Sander
120 and 220 grit sandpaper
Wood filler
Masking tape
Wood glue
Wood stain
Wood sealer
4 x 40 x 4mm cut screws
8 x 35 x 3mm cut screws
Step-by-step guide
Step 1: Measure on your settee/armchair the gap between the bottom and the floor; the clearance needed between the bottom of the settee/armchair and the arms. In my instance, I needed 20mm gap at the bottom with a little over 600mm for the side arms. The tabletop doesn’t need to be very big, just enough for a mug or a beer glass, a small plate and, of course, your phone or TV remote. I had a piece of Formica topped shelving 250 x 480mm. The table frame is made up of standard pine par 1.8m x 22 x 44 or 1.8m x 45 x 20. Because I had the 22mm format, I had to get a metre of it shaved down to 20mm.
Depending upon your measurements (see Fig. 1) cut the timber to the lengths you need. Remember the old adage of measuring twice before cutting, mark out the cut line with an adjustable square, so that if you’re using a hand saw/ back saw you don’t cut at an angle which is not a right angle and you remember to allow for the thickness of the saw cut. Or, of course, you can get the guy at the timber shop to cut everything to length on the table saw.
Measure the gap at the base, the height of the arm.
Diese Geschichte stammt aus der July/August 2020-Ausgabe von The Home Handyman.
Starten Sie Ihre 7-tägige kostenlose Testversion von Magzter GOLD, um auf Tausende kuratierte Premium-Storys sowie über 8.000 Zeitschriften und Zeitungen zuzugreifen.
Bereits Abonnent ? Anmelden
Diese Geschichte stammt aus der July/August 2020-Ausgabe von The Home Handyman.
Starten Sie Ihre 7-tägige kostenlose Testversion von Magzter GOLD, um auf Tausende kuratierte Premium-Storys sowie über 8.000 Zeitschriften und Zeitungen zuzugreifen.
Bereits Abonnent? Anmelden

UPGRADING home security
When it comes to home security, doors, locks, and handles are your first line of defence.
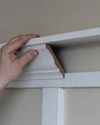
CEILING ELEGANCE
All you need to know about cornices and crown moulding.

8 DIY MYTHS YOU SHOULD STOP BELIEVING
DIY can seem intimidating, especially if you’re new to it or have heard some of the common myths that discourage people from trying their hand at it. But don’t let these misconceptions hold you back! Here are 8 DIY myths you should stop believing and the truth behind them.

WINDOW WONDERLAND
Windows are more than just functional parts of a home they're key design elements that influence your comfort, security, and energy efficiency.

CONCRETE CREATIONS: A guide to working with cement
With the right tools, techniques, and a little know-how, working with cement can be straightforward and incredibly rewarding.

HOW TO CARVE A WOODEN BIRD
Do you love nature and its beautiful creatures? Are you passionate about wood carving and want to combine the two? If so, you're in the right place! In this article, we'll show you how to carve a wooden bird that captures the beauty of nature and provides a satisfying creative outlet.
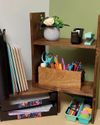
SHELF-INDULGENCE
Free-standing shelves are a versatile solution for tidying up almost any space. Whether it's your desk, kitchen, workshop, craft room, children's room, or even a spot for plants, these shelves can help you organise and declutter.
RACK IT UP
If you've ever wanted to create a custom shelf that combines industrial style with functionality, this project is for you! Using metal tubing and wood, you'll build a robust shelving unit perfect for organising your space.
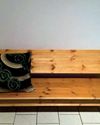
BUILDING A SIMPLE KITCHEN BENCH
I needed a kitchen bench, so I built one... When you're in need of furniture but don't want to spend a fortune, building it yourself can be both a cost-effective and satisfying solution.
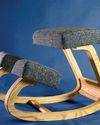
SIT HAPPENS
An ergonomic kneeling chair is a practical and stylish solution for anyone who spends long hours working at a desk.