VENEER-SHADE LAMP

After applying a finish, we often say that wood has a "glow." This project takes that to another level. The glow comes from within-a light bulb shines through veneer adhered to clear acrylic panels. The polished edges of the acrylic also create striking illuminated vertical accents at each corner. Tablesaw joinery makes this a simple project you can complete in a few evenings.
GET CLEAR ON THE VENEER
Clear epoxy adheres the veneer to the acrylic without diminishing any light. A lighter-colored veneer, such as the birch we used, lets more light through. A burl pattern adds character and looks great with a little prep. See Veneering? Relax. on the next page.
1 For the panels (A), cut four pieces of 1/8" acrylic to 64×124". A 60- or 80tooth blade in the tablesaw works well. Lightly sand the cut edges with 220-grit sandpaper to remove burrs.
2 Cut four 64×121/4" pieces of veneer. From scraps of 3/4" sheet goods, cut two 6/2×121/2" pieces to use as clamping cauls. Tear four 7" lengths of waxed paper from a roll and remove the protective film from one face of each piece of acrylic. Lay a piece of acrylic on one of the cauls, film side down.
3 On a clean piece of scrap, lay out two 11/2" diameter circles. Use these to evenly dispense and then mix the epoxy [Photo A]. Apply the thoroughly mixed epoxy to an acrylic panel [Photo B], place the veneer on it [Photo C], and clamp the assembly [Photo D]. Repeat this process to make the four panels (A), starting with a fresh mix of epoxy for each.
4 After the epoxy cures, trim the panels to finished size [Materials List]. Finish-sand the veneer to 220 grit.
5 Polish the long edges of each panel by sanding with 150-, 220-, and then 320-grit sandpaper [Photo E]. Then remove the remaining protective film.
VENEERING? RELAX.
Diese Geschichte stammt aus der July 2024 - Issue 296-Ausgabe von Wood.
Starten Sie Ihre 7-tägige kostenlose Testversion von Magzter GOLD, um auf Tausende kuratierte Premium-Storys sowie über 8.000 Zeitschriften und Zeitungen zuzugreifen.
Bereits Abonnent ? Anmelden
Diese Geschichte stammt aus der July 2024 - Issue 296-Ausgabe von Wood.
Starten Sie Ihre 7-tägige kostenlose Testversion von Magzter GOLD, um auf Tausende kuratierte Premium-Storys sowie über 8.000 Zeitschriften und Zeitungen zuzugreifen.
Bereits Abonnent? Anmelden
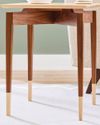
SOCK-LEG TABLE
Build this accent table and try your hand at an uncommon technique for dressing up tapered legs.
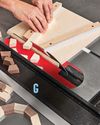
SLED INTO SUCCESS WITH SEGMENTED BOWLS
Start your journey toward creating beautiful bowls with the first critical step: accurately cutting and assembling the angled segments.
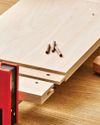
BREADBOARD ENDS DONE RIGHT
This traditional method for concealing end grain relies on a hidden trick to work properly. Find out the \"hole\" story behind breadboard ends with this time-tested method.

TRANSFORMABLE TOOL STAND
Simple but sturdy, this mobile stand can hold a benchtop power tool. Build two stands and you can stack them or pair them as pedestals for an add-on workbench top.
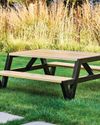
MODERN PICNIC TABLE
Serve up some style at your next cookout or outdoor party with this eye-catching table and bench combo.
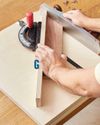
MITER-GAUGE SHOOTING BOARD
Build this shooting board in an afternoon; use it for a lifetime to produce gap-free joinery with just a few strokes of a hand plane.
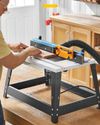
BENCHTOP ROUTER TABLES
Can compact tables deliver big-time routing features and performance? We tested 11 benchtop models to find out.
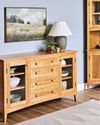
CLASSIC CHERRY SIDEBOARD
A plywood carcase provides a quick-to-build foundation for the dovetailed drawers and mortise-and-tenon doors.
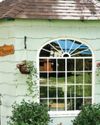
STUDIO? WOOD SHOP? YES!
Don't mistake this backyard shed as a high-end home for garden tools. Instead, you'll find an efficient, well-lit, and comfortable workshop inside.
