Supplies
It's a short list of supplies for this project. You'll need:
• A tube of clear kitchen and bath silicone (try to avoid the cheap stuff!)
• A silicone gun
• A roll of painters tape
• A flat-blade knife like a boxcutter or a razor blade
As a contractor, I see two very common problems in a lot of bathrooms (including my own!) and in this article, I'm going to show you how to fix them.
The first is sloppily applied silicone. Amateur builders love to lay on heaps of silicone in the bathroom. It covers a lot of sins and at first, it doesn't look that bad. The problem is that over time those big thick silicone lines are the perfect place for mould to grow. Yip, those black spots accumulating in the corner, those are mould, unfortunately. The more silicone you use, the faster the mould will grow and spread.
The second is that many people use white silicone in bathrooms. I get what they are thinking, there's lots of white stuff in the bathroom. The toilet, the bath, the sink, etc, it's all white. Here's the thing though, there are a million different shades of white. So, there's a 99% chance that the white silicone isn't going to match anything in the bathroom. It's almost certainly at least a little bit off.
Let's fix both of them at the same time!
Step-by-step guide
Step 1: Prep
The first step is going to be an easy one. Just remove everything you can so that you have room to work. All of those shampoo bottles in the corner? Yes. They are going to have to go. Shower curtain? If you can, pull it down. The more room to work you the easier this job is going to be.
Next, give the whole shower a quick wipe-down. You're trying to remove any loose dirt or water left over from the last time you used it.
Esta historia es de la edición January/February 2023 de The Home Handyman.
Comience su prueba gratuita de Magzter GOLD de 7 días para acceder a miles de historias premium seleccionadas y a más de 9,000 revistas y periódicos.
Ya eres suscriptor ? Conectar
Esta historia es de la edición January/February 2023 de The Home Handyman.
Comience su prueba gratuita de Magzter GOLD de 7 días para acceder a miles de historias premium seleccionadas y a más de 9,000 revistas y periódicos.
Ya eres suscriptor? Conectar
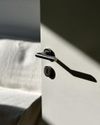
UPGRADING home security
When it comes to home security, doors, locks, and handles are your first line of defence.
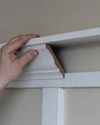
CEILING ELEGANCE
All you need to know about cornices and crown moulding.

8 DIY MYTHS YOU SHOULD STOP BELIEVING
DIY can seem intimidating, especially if you’re new to it or have heard some of the common myths that discourage people from trying their hand at it. But don’t let these misconceptions hold you back! Here are 8 DIY myths you should stop believing and the truth behind them.

WINDOW WONDERLAND
Windows are more than just functional parts of a home they're key design elements that influence your comfort, security, and energy efficiency.

CONCRETE CREATIONS: A guide to working with cement
With the right tools, techniques, and a little know-how, working with cement can be straightforward and incredibly rewarding.

HOW TO CARVE A WOODEN BIRD
Do you love nature and its beautiful creatures? Are you passionate about wood carving and want to combine the two? If so, you're in the right place! In this article, we'll show you how to carve a wooden bird that captures the beauty of nature and provides a satisfying creative outlet.
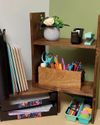
SHELF-INDULGENCE
Free-standing shelves are a versatile solution for tidying up almost any space. Whether it's your desk, kitchen, workshop, craft room, children's room, or even a spot for plants, these shelves can help you organise and declutter.
RACK IT UP
If you've ever wanted to create a custom shelf that combines industrial style with functionality, this project is for you! Using metal tubing and wood, you'll build a robust shelving unit perfect for organising your space.
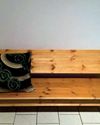
BUILDING A SIMPLE KITCHEN BENCH
I needed a kitchen bench, so I built one... When you're in need of furniture but don't want to spend a fortune, building it yourself can be both a cost-effective and satisfying solution.
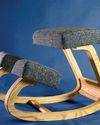
SIT HAPPENS
An ergonomic kneeling chair is a practical and stylish solution for anyone who spends long hours working at a desk.