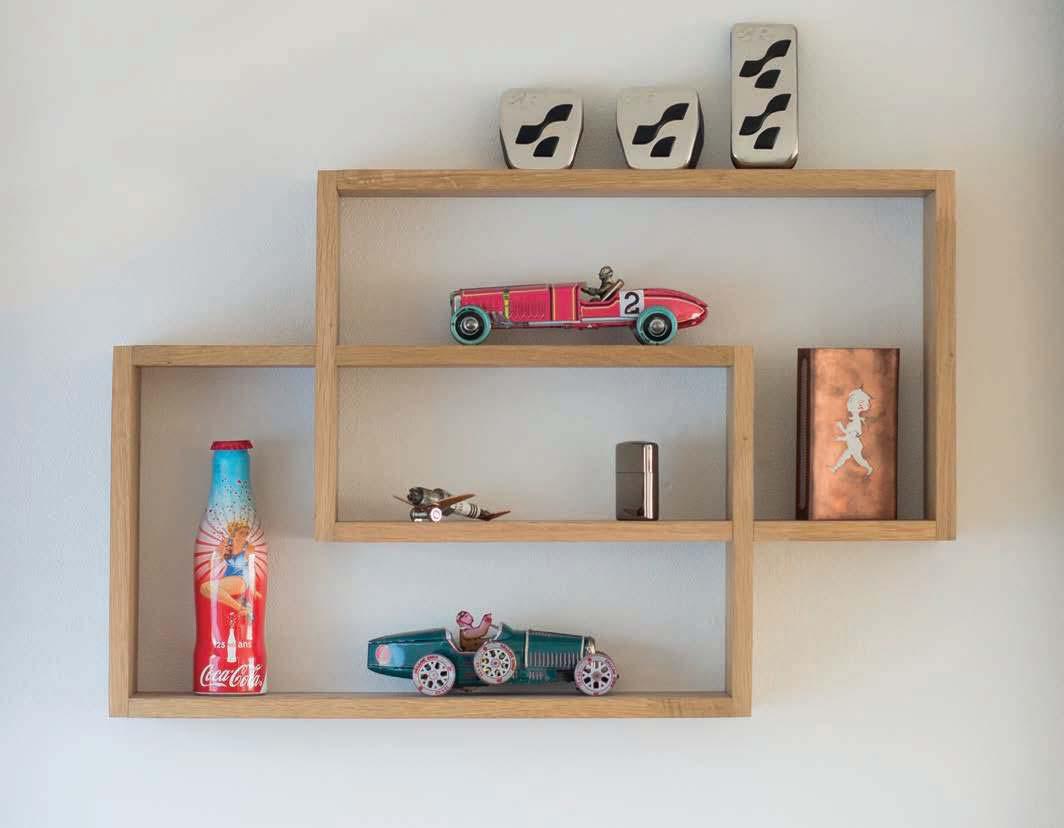
I am what you in Swedish would call a "prylkille". If one would directly translate the word it would be stuff guy, meaning that I like collecting lots of different things. To display some of my stuff, my mom and I made a big Massironi shelf a while back. However, this one is now full, which is why I decided to make another shelf.
I wanted the shelf to stand out and be able to store different things, which is why I designed the shelf in this particular way. Since I like symmetry, the shelf consists of two parts, out of which the second part of the shelf is shifted by 25 percentage.
In this article, I will walk you through my process of making this particular shelf, as well as providing you with the necessary information tools to redesign and make your own shelf.
What you will need
These are the following materials and tools that I used for creating the shelf:
Materials:
- Wood (1500 x 200 x 12mm)
- Wood glue
- Wood dust
Tools:
- Ruler
- Plainer
- Saw
- Sander
- Sandpaper
- Wax
- Brackets
Step-by-step guide
Step 1: My design
You will see the drawings for the design that I created. If you want to use this design, either print it or use the template to draw these onto the planks.
Step 2: Your design?
Do you want a bigger shelf? Maybe you want to shift it more than 25% as I did? If that is the case get your paper and pen or a CAD software and get designing.
This story is from the {{IssueName}} edition of {{MagazineName}}.
Start your 7-day Magzter GOLD free trial to access thousands of curated premium stories, and 9,000+ magazines and newspapers.
Already a subscriber ? Sign In
This story is from the {{IssueName}} edition of {{MagazineName}}.
Start your 7-day Magzter GOLD free trial to access thousands of curated premium stories, and 9,000+ magazines and newspapers.
Already a subscriber? Sign In

MAKE SOME NOISE!
Are you ready to embark on a musical adventure and create your very own drum kit from recycled materials? Get ready to unleash your creativity and make some noise with this fun and eco-friendly DIY project. Let’s dive into the step by-step guide and bring your mini band to life!

DIY HOME APPLIANCE REPAIR
From the whirring of the washing machine to the gentle hum of the refrigerator, our trusty home appliances keep our households running smoothly. But what happens when these essential gadgets start to falter?

EFFECTIVE METHODS FOR A PEST-FREE HOME
Pests, those unwelcome guests, can turn our homes into uncomfortable environments, disrupting our peace and posing health risks.

COMMON SEALANTS FOR DIY USE
By familiarising themselves with the diverse array of sealants available, mastering proper application techniques, and prioritising safety at every step, DIY'ers and homeowners in South Africa can tackle sealing projects with confidence and achieve lasting results that enhance the comfort, efficiency, and aesthetics of their homes.

UNLOCKING THE POWER OF ANGLE GRINDERS
In the world of DIY, few tools are as versatile and indispensable as the angle grinder. From cutting and grinding to polishing and sharpening, this powerhouse tool is a must have for any homeowner or DIY enthusiast.

DRYWALL DECODED
Drywall, also known as gypsum board or plasterboard, is a ubiquitous building material used in the construction of interior walls and ceilings.

DIY PROJECT IDEAS for a stylish cooking space
The kitchen is often considered the heart of the home, a place where culinary magic happens and memories are made.

MÖLKKY, A THROWING GAME (NO POWER TOOLS)
In this article we’ll be making a backyard throwing game called Mölkky, which originates from Finland.

Building your own SAUNA: PART 1
Growing up, I was always intrigued by saunas. I usually avoid extreme temperatures, but there’s something about a sauna that speaks to the soul. They’re relaxing, cleansing, and a great way to soothe your body after a long day’s work in winter.

KITCHEN LIGHT MADE FROM SCRAP
I made a simple and modest lamp for our kitchen table. The goal was to use scrap wood, as I like to turn things we have no use for, into something nice and needed.