The Column tool in Affinity Photo lets you take the merest sliver of an image, which can then be stretched out to form a vibrant band of colour. You can specify a number of pixels for the width, so you can go for a single row of pixels or – as we’ve done here – make it a few pixels wide. Once expanded, we get an eclectic mix of colour to match the palette of our portrait.
We’ll show you how to use the technique here to craft a vibrant effect. It may look complicated, but it’s a simple matter of copying and stretching our selections, then using a distorting filter to transform the colourful strips into circles. Along the way we’ll explore key Affinity Photo skills, such as layer masking and outer shadows. As is often the case with an effect like this, the real skill comes not in the basic technique, but in fine-tuning it so that everything works together. We can do so by using subtle shadow effects so that the figure and colours feel more real. Finally, we can add variety to our colourful circles by duplicating and reusing them in different ways around the image.
We’ve supplied the Stretch.jpg start image for you to experiment with here, but why not use your own photo? All you need is a shot of a person on a plain backdrop. A jump or similar action pose can lead to dynamic results.
This story is from the {{IssueName}} edition of {{MagazineName}}.
Start your 7-day Magzter GOLD free trial to access thousands of curated premium stories, and 9,000+ magazines and newspapers.
Already a subscriber ? Sign In
This story is from the {{IssueName}} edition of {{MagazineName}}.
Start your 7-day Magzter GOLD free trial to access thousands of curated premium stories, and 9,000+ magazines and newspapers.
Already a subscriber? Sign In

The Art of Copying Art - James Paterson shows you how to use your Canon gear to capture artwork and paintings the right way with simple camera and lighting skills
Whether you want to capture a painting like the above, digitise old prints or reproduce any kind of canvas, there's real skill in capturing artwork with your camera. Not only do you need the colours to be accurate, you also need to master the spread, angle and quality of the light to minimise glare and show the work at its best.This painting by the artist Bryan Hanlon has a wonderfully subtle colour palette. To reproduce the painting in print and digital form, it needs to be captured in the right way.

Fright night
Canon photographer and digital artist Alexander loves to craft incredible fantasy scenes with a spooky horror twist

Sharpen your shots with DPP
Sharpening a digital image also increases contrast at the edge of details

CANON ImagePrograf PRO-1100
Deeper blacks, better bronzing, greater lifespan and 5G Wi-Fi -Canon's new printer is full of new tech, says

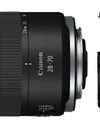
Canon's new 'kit lens' is actually a half-price f/2.8 trinity lens!
The Canon RF 28-70mm F2.8 IS STM lacks a red ring, but borrows premium features from its L-series siblings

DREW GIBSON
Pro motorsports photographer Drew on why he hasn't (yet) switched to Canon's mirrorless system, why old-school techniques can be the most reliable, and the lessons learned from more than a decade shooting the world's biggest car brands

Up in smoke
Make a smoky shape in Affinity Photo and get to grips with the amazing Liquify Persona under the guidance of James Paterson

Expand your creativity with Generative Fill
Photoshop's Al-powered feature brings revolutionary new tools to image editing. James Paterson reveals all...

Turn your images into vintage postcards
Wish you were here? Sean McCormack explains how you can give your summer photographs a vintage postcard look

The Angel Malibu
Light painting an American movie producer in the Wadi Rum Desert in Jordan was a highly unlikely evening out for David!