
If you've been gathering inspiration for a kitchen remodel, there's no doubt you've seen kitchens with open shelves. It's a popular look since they make the room feel bigger and more open. These shelves can be installed in several ways, and after some research and testing, I found a slick system for adding open shelving that leaves no hardware in sight, giving the shelves a "floating" look.
1 DETERMINE THE SHELF PLACEMENT
I used painter's tape to mark the locations of the shelves. Once I was satisfied with the layout, I was able to take shelf measurements and mark stud locations to determine the length of each mounting bracket.
MOUNTING REQUIREMENTS
Each mounting bracket needs to be attached to two studs and should be cut no less than half the shelf length, with a minimum bracket length of 18 in.
2 CUT THE SHELF PARTS
Each shelf has three parts: a top, a bottom and a filler. With the shelf lengths determined, rip the tops and bottoms for each shelf to 10-1/4 in. (1/4 in. wider than their final width). Rip the fillers 1 in. narrower than the tops and bottoms. Then cut the shelves slightly longer than their final dimension.
3 CUT THE RABBETS
I cut a 1-in. x 3/8-in.-deep rabbet along the edges of the top and bottom shelf parts (see Figure A). Because the first cut is made with the board on edge, I used a tall featherboard to push the plywood against the fence as I fed the boards through the saw blade. I made all the cuts this way, then adjusted the fence and blade to finish the rabbet with the board flat on the table.
4 ADD THE FILLER PIECES
この記事は Family Handyman の October - November 2022 版に掲載されています。
7 日間の Magzter GOLD 無料トライアルを開始して、何千もの厳選されたプレミアム ストーリー、9,000 以上の雑誌や新聞にアクセスしてください。
すでに購読者です ? サインイン
この記事は Family Handyman の October - November 2022 版に掲載されています。
7 日間の Magzter GOLD 無料トライアルを開始して、何千もの厳選されたプレミアム ストーリー、9,000 以上の雑誌や新聞にアクセスしてください。
すでに購読者です? サインイン

7 Bicycle Maintenance Tips
Keep your bike in tiptop shape and ride safe!
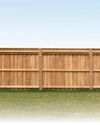
SETTING FENCE POSTS WITH EXPANDING FOAM
Any fence builder knows you need strong posts for a strong fence, and that means backfilling the postholes with a dense, hard material other than dirt.

PEBBLE MOSAIC STEPPING STONES
COLLECT SOME RIVER ROCK AND MAKE YOUR OWN UNIQUE STEPPINGSTONE PATH

EARTH-FRIENDLY WEED KILLERS
HEALTHIER CHOICES FOR HUMANS AND THE ENVIRONMENT
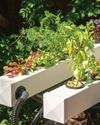
DIY! HYDROPONIC GARDEN
FRESH VEGETABLES AT YOUR FINGERTIPS

GROW MINI VEGETABLES
GROW A GARDEN IN A TINY SPACE!

BUILD A VERTICAL GARDEN
TIME TO GROW UP!
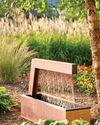
MODERN WATER FOUNTAINS
A SPLASH OF PEACE FOR YOUR PATIO

9 ALTERNATIVE USES FOR SAWDUST
Every fully stocked wood shop has a table saw. You can usually find a pile of sawdust under it, even if it's used only occasionally. If a shop has a belt sander or band saw, there's probably another pile of finer sawdust under that. Even people without stationary tools have sawdust accumulation on their workbenches.

INSULATE WITH FOAM
IT'S A GREAT ALTERNATIVE TO FIBERGLASS