A classic design, reinvented for comfort and easy building

This chair is hard to beat for comfort, economy and ease of building. The design is based on a couple chairs I’ve had at the family cabin for more than a decade. Being a fiddle with-it kind of guy, I modified the originals over the years, built others and eventually chose this design.
I think it’s about as close to perfect as you can get: It’s comfortable to sit in for hours at a time, the arms are wide enough to hold a drink, and you’re reclined enough for relaxation, but not so much that you’ll groan every time you get up (unlike with most Adirondack chairs). It will accept a common type of outdoor chair cushion, available at any home center, but doesn’t require one. It’s light enough to move around easily, and you can fit it through a doorway without contortions. Plus, it’s inexpensive and easy to build.
Skills, tools & lumber
This is a beginner to intermediate level project. If you have just a little experience with tools, you can do it. You’ll need an orbital or a random-orbit sander, a 7/16-in. wrench, six clamps and a drill. You can cut parts with a circular saw and drive nails with a hammer, but you’ll get faster, nicer results with a miter saw, an air compressor and an 18-gauge brad nailer.
I’ve built this design from both pine and cedar. Each pine chair will cost you about $60, cedar about $90. Cedar is a better choice if your chairs are going to spend much time out in the rain. You may find it hard to buy 1x3 cedar, so you may have to rip a 1x6 in half. Also note that rough cedar is usually thicker than 3/4 in., while pine boards come in the standard 3/4-in. thickness. When you’re building the seat and back, keep those different thicknesses in mind
Build a prototype
Denne historien er fra March 2017-utgaven av The Family Handyman.
Start din 7-dagers gratis prøveperiode på Magzter GOLD for å få tilgang til tusenvis av utvalgte premiumhistorier og 9000+ magasiner og aviser.
Allerede abonnent ? Logg på
Denne historien er fra March 2017-utgaven av The Family Handyman.
Start din 7-dagers gratis prøveperiode på Magzter GOLD for å få tilgang til tusenvis av utvalgte premiumhistorier og 9000+ magasiner og aviser.
Allerede abonnent? Logg på

7 Bicycle Maintenance Tips
Keep your bike in tiptop shape and ride safe!
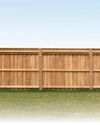
SETTING FENCE POSTS WITH EXPANDING FOAM
Any fence builder knows you need strong posts for a strong fence, and that means backfilling the postholes with a dense, hard material other than dirt.

PEBBLE MOSAIC STEPPING STONES
COLLECT SOME RIVER ROCK AND MAKE YOUR OWN UNIQUE STEPPINGSTONE PATH

EARTH-FRIENDLY WEED KILLERS
HEALTHIER CHOICES FOR HUMANS AND THE ENVIRONMENT
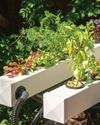
DIY! HYDROPONIC GARDEN
FRESH VEGETABLES AT YOUR FINGERTIPS

GROW MINI VEGETABLES
GROW A GARDEN IN A TINY SPACE!

BUILD A VERTICAL GARDEN
TIME TO GROW UP!
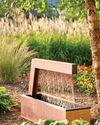
MODERN WATER FOUNTAINS
A SPLASH OF PEACE FOR YOUR PATIO

9 ALTERNATIVE USES FOR SAWDUST
Every fully stocked wood shop has a table saw. You can usually find a pile of sawdust under it, even if it's used only occasionally. If a shop has a belt sander or band saw, there's probably another pile of finer sawdust under that. Even people without stationary tools have sawdust accumulation on their workbenches.

INSULATE WITH FOAM
IT'S A GREAT ALTERNATIVE TO FIBERGLASS