CATEGORIES
فئات

Bridget Jones Never Gets Old
How the beloved British diarist outlasted her critics

ALL THE KING'S CENSORS
When bureaucrats ruled over British theater

Cozy Time
Brigette Romanek spreads comfort and sophistication with Crate & Barrel

Block Party
After doing its time in trend jail, this building material is back in fashion

When Robert Frost Was Bad
Before he became America's most famous poet, he wrote some real howlers.

"I Am Still Mad to Write"
How a tragic accident helped Hanif Kureishi find his rebellious voice again

The Moron Factory
April 20: Sometimes feel life stinks, everything bad/getting worse, everyone doomed.

Talk of the Town
In the heart of Milan, Molteni&C transforms a historic palazzo into a showcase for Italian craft

WHY THE COVID DENIERS WON
Lessons from the pandemic and its aftermath

MOVABLE FEAST
AFTER YEARS OF LIVING IN LA, ACTOR WALTON GOGGINS AND DIRECTOR NADIA CONNERS IMAGINE A NEW LIFE FOR THEIR FAMILY IN THE HUDSON VALLEY

Generational Wisdom
Studio DB's Damian and Britt Zunino give new life to his childhood home in a classic Manhattan loft

CAN EUROPE STOP ELON MUSK?
He and other tech oligarchs are making it impossible to conduct free and fair elections anywhere.
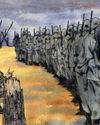
The Warrior's Anti-War Novel
In All Quiet on the Western Front, Erich Maria Remarque invented modern war writing.

Pastoral Poetry
Grace Fuller Marroquin adds new romance and lush beauty to a Hamptons home

Sound and Vision
Teaming up with The Rug Company once again, Kelly Wearstler transforms music into dynamic new material

Labor of Love
For design duo Kim Hostler and Juliet Burrows, home is where the art is

Taking It Slow
CREATIVE COUPLE MARIE-LOUISE AND MARC HOM THOUGHTFULLY UPDATE A HISTORIC RETREAT IN COOPERSTOWN, NEW YORK

ripple effect
Designed by Diller Scofidio + Renfro for Her Highness Sheikha Moza bint Nasser of Qatar, a new women's mosque in. Doha champions a spiritual and educational model for the wider Islamic world

LOVE LANGUAGE
In her new home in NYC, Celerie Kemble makes room for all the things and people she cherishes

CULTURE CLUB
Neda Kakhsaz and Zabie Mustafa of Studio MUKA pay homage to their Persian and Uzbek roots in the couple's distinctly modern Los Angeles home

Stuck In Place
Why Americans stopped moving houses-and why that's a very big problem

HISTORY BUFFED
In Portland, Oregon, an artistic family turns to Jessica Helgerson to help make an old house feel fresh

Who's Your Mommy?
I knew that becoming a parent would change me. I just didn't know how.

BEHOLD MY SUIT!
A LIFETIME OF FASHION MISERY COMES TO AN END.

The Experimentalist
Ali Smith's novels scramble plotlines, upend characters, and flout chronologywhile telling propulsively readable stories.

CAPITULATION IS CONTAGIOUS
By killing a cartoon that lampooned its owner, The Washington Post set a dangerous precedent.

The Indoor Mile Record Stood for Years. Then It Fell Twice in Five Days.
One week ago, Yared Nuguse was walking on air.

Released Gaza Hostages Face Long, Wrenching Recoveries
Nightmares, injuries and survivor's guilt haunt former captives for months after being freed; my body is still tense’

Flunking a Personality Test Can Cost You Your Dream Job
Employers are studying psychologists’ questionnaires, astrology and handwriting analysis

Meta's AI-Powered Ray-Bans Help Blind Navigate Life
After Allison Pomeroy lost most of her vision two years ago, her husband began reading menus, signage, and other text out loud to her. He doesn't need to anymore.