
Materials
- 4 wooden shelves
- Around 40 screws
- 8 hinges
- Wood glue
- Stain
Tools
- Clamps
- Saw
- Sander
- Mitre box
Playing with sand is not only fun for children of all ages, but it is also very educational. But our sandpit was also very messy with cats running around it. So, I searched for a good and handy lid but the size of my sandpit was not standard. So I decided to make my own based on a picture 1 found online!
Here are some simple instructions on how to make your own lid, for the size that is most comfortable for you! We have now used this sandbox lid for five months and we are still having fun with it! (And the 4-year-old is able to open the lid herself. If you have a smaller sandbox, smaller kids can open the lid (depending on the weight of the wood).
Step-by-step guide
Step 1: Measure your sandbox (or define the size if you have to build a sandpit from scratch. If you do make your own sandpit, we dug a hole, placed stones at the side and tiles at the bottom and then filled it with sifted sand).
In our case, the sandbox was 1400 millimetres wide and long. The side of the box in our case is 50mm thick. These sizes are important for selecting the right wooden shelves.
The math: (width of the sandbox + thickness of the side) / 8 (if you want the same look, 4 is also possible) = maximum width of the shelves.
We searched for a shelf that was 110mm smaller than that outcome, allowing a small space in between the shelves (also giving some room for error).
We also needed to clear the stones from sharp material.
Denne historien er fra July/August 2022-utgaven av The Home Handyman.
Start din 7-dagers gratis prøveperiode på Magzter GOLD for å få tilgang til tusenvis av utvalgte premiumhistorier og 9000+ magasiner og aviser.
Allerede abonnent ? Logg på
Denne historien er fra July/August 2022-utgaven av The Home Handyman.
Start din 7-dagers gratis prøveperiode på Magzter GOLD for å få tilgang til tusenvis av utvalgte premiumhistorier og 9000+ magasiner og aviser.
Allerede abonnent? Logg på

UPGRADING home security
When it comes to home security, doors, locks, and handles are your first line of defence.
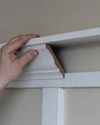
CEILING ELEGANCE
All you need to know about cornices and crown moulding.

8 DIY MYTHS YOU SHOULD STOP BELIEVING
DIY can seem intimidating, especially if you’re new to it or have heard some of the common myths that discourage people from trying their hand at it. But don’t let these misconceptions hold you back! Here are 8 DIY myths you should stop believing and the truth behind them.

WINDOW WONDERLAND
Windows are more than just functional parts of a home they're key design elements that influence your comfort, security, and energy efficiency.

CONCRETE CREATIONS: A guide to working with cement
With the right tools, techniques, and a little know-how, working with cement can be straightforward and incredibly rewarding.

HOW TO CARVE A WOODEN BIRD
Do you love nature and its beautiful creatures? Are you passionate about wood carving and want to combine the two? If so, you're in the right place! In this article, we'll show you how to carve a wooden bird that captures the beauty of nature and provides a satisfying creative outlet.
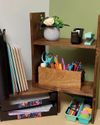
SHELF-INDULGENCE
Free-standing shelves are a versatile solution for tidying up almost any space. Whether it's your desk, kitchen, workshop, craft room, children's room, or even a spot for plants, these shelves can help you organise and declutter.
RACK IT UP
If you've ever wanted to create a custom shelf that combines industrial style with functionality, this project is for you! Using metal tubing and wood, you'll build a robust shelving unit perfect for organising your space.
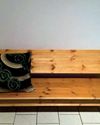
BUILDING A SIMPLE KITCHEN BENCH
I needed a kitchen bench, so I built one... When you're in need of furniture but don't want to spend a fortune, building it yourself can be both a cost-effective and satisfying solution.
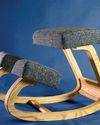
SIT HAPPENS
An ergonomic kneeling chair is a practical and stylish solution for anyone who spends long hours working at a desk.