
Dismantling
Both of these locomotives are built using a very similar method. On both of them virtually everything is removable by means of a few nuts and bolts or screws. There are lots of awkward corners on any model but this method makes sure there are no impossible corners. The method for one of the front plates is given as an example. Remove the front and rear vertical surrounds. Drain the lubricator if needed. Remove the steam and exhaust pipes. There are four bolts holding the top plate. Underneath the engine mounting is a removable mudguard (photo 48). An Allen key can be used to remove the first countershaft behind the crankshaft. With a few more bolts the engine mounting can then be removed. This is a very quick sequence to follow with no need to melt any solder. All the various assemblies can be removed easily and because of this any necessary work becomes a pleasure.
At the front and rear of the locomotive are the vertical plates. I know it is probably not to scale but if these are made removable then it becomes very easy to clean and maintain the locomotive. Both are made to the same pattern. Poking out of the base of each are two steel pins. These match up with tubes set into the floor plates; each tube is half an inch in length and can either be soft or silver soldered into place. Obviously, this should be done with the plates out of the locomotive. The sheet brass used was 1.2 mm thickness but it could have been 0.8 mm. I thought the thinner material might flap about a bit unless it was stiffened. Photograph 49 shows each piece with a lamp bracket and lamps which were made from ⅜ inch square brass.
この記事は Model Engineer の 4635 版に掲載されています。
7 日間の Magzter GOLD 無料トライアルを開始して、何千もの厳選されたプレミアム ストーリー、9,000 以上の雑誌や新聞にアクセスしてください。
すでに購読者です ? サインイン
この記事は Model Engineer の 4635 版に掲載されています。
7 日間の Magzter GOLD 無料トライアルを開始して、何千もの厳選されたプレミアム ストーリー、9,000 以上の雑誌や新聞にアクセスしてください。
すでに購読者です? サインイン
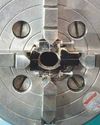
WORKSHOP TIP - Boring Eccentrics
I am making a 1 inch Minnie traction engine and have arrived at the machining of the eccentric straps.
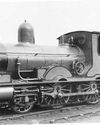
Wenford A 7¼ Inch Gauge 2-4-0 Beattie Well Tank
The stage has now been reached where the well tank body can be completed but beforehand there are some internal details to add.
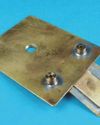
Vertical Boiler Locomotives
Vertical Boiler Locomotives
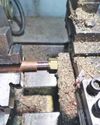
Union Nuts, and How to Make Them
These are quite different from those commercially available and are made from copper
SHOWCASE Paul's Engine
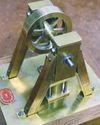
One day my son Paul came to me and asked if we could make something in my workshop, so that he could learn engineering processes.
CLUB NEWS
My secret’s out!

Building Dancer - The Boiler
Dancer needed a boiler that would be somewhat larger than the size permitted under the Model Engineering exemptions in the New Zealand regulations.
An Inverted ‘Ross Yoke' Watercooled Stirling Engine
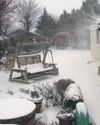
As with all my hot air engines they are cheap to build, mostly from scrap
A Draught Proposal
A Draught Proposal
A Boiler Feed Pump
A Boiler Feed Pump