
Hardware and supplies:
13 x 32mm fine-thread Kreg Pocket-Hole Screws
8 x #6 x 38mm flat-head wood screws
1 x 13mm x 915mm Aluminum Round Rod
1 x 10mm Cove Router Bit Epoxy
Wood products:
• 1 x 19mm x 38mm x 1800mm maple
• 1 x 19mm x 38mm x 1220mm cherry
• 1 x 19mm x 140mm x 1220mm cherry
Tools:
- Drill/driver
- Sander
- Kreg pocket-hole jig
- Tape measure
- Miter saw
- Router
- Combination square
- Hacksaw
This serving tray offers a unique style by incorporating two classic hardwoods - cherry and maple, although these can be swapped out for local woods - along with aluminum bar stock for the handles, and a subtle routed detail that you can add if desired. They tray is easy to build, though, using three boards, the aluminum bar, and some screws.
Step-by-step guide
Step 1: Make the Bottom Rails
Start by cutting Two Bottom Rails to size from a19mm x 38mm maple board, as shown in the cutting diagram. Set your Kreg Pocket-Hole Jig for 19mm-thick material, and then drill a pocket hole in each end at the locations shown. Notice that the pocket holes are off centre. That way, when the center panel gets attached, the holes will be covered up. Now you need to drill four holes, as shown, in line with the pocket holes. These will be used to attach the outer parts of the tray, called Wings, later. Use a 3mm drill bit with a countersink, or follow up with a larger-diameter bit to countersink the holes, as shown.
Step 2: Make the Handle Rails
この記事は The Home Handyman の July/August 2022 版に掲載されています。
7 日間の Magzter GOLD 無料トライアルを開始して、何千もの厳選されたプレミアム ストーリー、9,000 以上の雑誌や新聞にアクセスしてください。
すでに購読者です ? サインイン
この記事は The Home Handyman の July/August 2022 版に掲載されています。
7 日間の Magzter GOLD 無料トライアルを開始して、何千もの厳選されたプレミアム ストーリー、9,000 以上の雑誌や新聞にアクセスしてください。
すでに購読者です? サインイン

UPGRADING home security
When it comes to home security, doors, locks, and handles are your first line of defence.
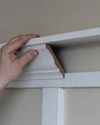
CEILING ELEGANCE
All you need to know about cornices and crown moulding.

8 DIY MYTHS YOU SHOULD STOP BELIEVING
DIY can seem intimidating, especially if you’re new to it or have heard some of the common myths that discourage people from trying their hand at it. But don’t let these misconceptions hold you back! Here are 8 DIY myths you should stop believing and the truth behind them.

WINDOW WONDERLAND
Windows are more than just functional parts of a home they're key design elements that influence your comfort, security, and energy efficiency.

CONCRETE CREATIONS: A guide to working with cement
With the right tools, techniques, and a little know-how, working with cement can be straightforward and incredibly rewarding.

HOW TO CARVE A WOODEN BIRD
Do you love nature and its beautiful creatures? Are you passionate about wood carving and want to combine the two? If so, you're in the right place! In this article, we'll show you how to carve a wooden bird that captures the beauty of nature and provides a satisfying creative outlet.
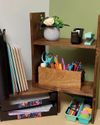
SHELF-INDULGENCE
Free-standing shelves are a versatile solution for tidying up almost any space. Whether it's your desk, kitchen, workshop, craft room, children's room, or even a spot for plants, these shelves can help you organise and declutter.
RACK IT UP
If you've ever wanted to create a custom shelf that combines industrial style with functionality, this project is for you! Using metal tubing and wood, you'll build a robust shelving unit perfect for organising your space.
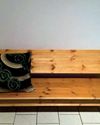
BUILDING A SIMPLE KITCHEN BENCH
I needed a kitchen bench, so I built one... When you're in need of furniture but don't want to spend a fortune, building it yourself can be both a cost-effective and satisfying solution.
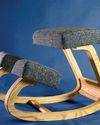
SIT HAPPENS
An ergonomic kneeling chair is a practical and stylish solution for anyone who spends long hours working at a desk.