Prøve GULL - Gratis
Perfect Portraits
N-Photo: the Nikon magazine
|May 2019
James Paterson gets to grips with the key and fill technique for beautifully lit portraits
-

Key and fill is one of the most fundamental concepts in lighting. It’s a reliable technique not just for portraits, but for lots of different subjects.
In essence a key and fill are two light sources – one slightly stronger than the other. The key light is the main light used to illuminate our subject, while the fill light provides a lift to the shadows. It’s such an effective technique for lighting because it gives depth and form to our subject. It provides a play of light and shade across them and it’s this that creates a sense of depth and shape to the face of our model.
What’s more, by tweaking the ratio of our two light sources we can control the contrast over our subject. With a low-strength fill light the contrast will be strong, and with a higher fill light the contrast will be less severe.
Our two light sources for key and fill could be anything we like: studio flash, Speedlites, LEDs, sunlight, reflectors… even your phone torch. Initially, here, we’ve used two LEDs, and over the page we also explore using flash.
You can also get technical with it and measure the differences using a light meter. This level of precision is great practice, but it’s not essential. You can also take a few test shots and eyeball it, judging the strength of the fill.
Over the next few pages we’ll look at how this simple setup can lead to great portraits in the studio, and all kinds of other scenarios.…

THE SETUP / Key and fill lighting
1 Key light
Denne historien er fra May 2019-utgaven av N-Photo: the Nikon magazine.
Abonner på Magzter GOLD for å få tilgang til tusenvis av kuraterte premiumhistorier og over 9000 magasiner og aviser.
Allerede abonnent? Logg på
FLERE HISTORIER FRA N-Photo: the Nikon magazine
N-Photo: the Nikon magazine
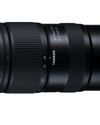
Tamron 28-75mm f/2.8 Di III RXD G2
The original version broke the mould for ‘trinity' standard zooms. The G2 enhances handling and performance further still
2 mins
Summer 2024
N-Photo: the Nikon magazine
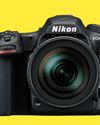
Nikon D500
Nikon's flagship DX-format DSLR is a modern classic. And while it hasn't been out of production for long, it left a hole in Nikon's camera line-up that's never been filled
1 mins
Summer 2024

N-Photo: the Nikon magazine
Laurence Griffiths
With so much sporting action this summer, Laurence Griffiths of Getty Images reveals how to catch every goal at the Euros, details Getty Images' 24/7 Olympics coverage and why he always has a wide-angle ready. Keith Wilson managed to grab him before kick-off...
10 mins
Summer 2024
N-Photo: the Nikon magazine
Ghost town
Adam Waring uses ND filters to subdue the hustle and bustle when shooting busy cities
2 mins
Summer 2024
N-Photo: the Nikon magazine
Creative cities
Experienced travel photographer Matt Higgs provides top tips for stunning shots of city sights
2 mins
Summer 2024

N-Photo: the Nikon magazine
If at first you don't succeed...
Tom travels to the other side of the world to have another go at shooting an elusive image and displays the power of his perseverance
3 mins
Summer 2024

N-Photo: the Nikon magazine
Shoot the summer of sports
Have the Olympics and Euros inspired you to photograph sport? Mike Harris shows you how to score a portfolio of top shots
15 mins
Summer 2024

N-Photo: the Nikon magazine
Osprey & prey
Birds of a feather Gary Jones and Leigh Pugh photograph ospreys from a purpose-built hide
8 mins
Summer 2024
N-Photo: the Nikon magazine
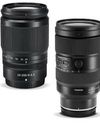
Superzoom lenses
These lenses will have you in for a long stretch, some more than others in the wide-angle to telephoto stakes
5 mins
Summer 2024
N-Photo: the Nikon magazine
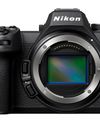
Nikon Z 6III
With a revolutionary 'partially stacked' full-frame sensor, the Z 6III fits flagship camera features in an compact enthusiast-level body
8 mins
Summer 2024
Translate
Change font size
