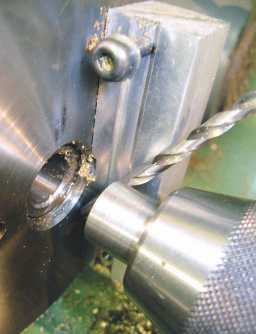
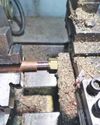
It had the short leg soldered on then the through hole was drilled and the thread formed before cutting off from the parent material. Setting of work on the top plate is achieved off the machine making it very straightforward (photos 263, 264 and 265). It is firstly loosely clamped in place, then set on a parallel on the surface plate and the clamps tightened. The Tee is therefore aligned square with the lathe axis before it even meets the faceplate.
Okay, the parallel can be used in situ on the faceplate, but how many hands have you got? Along with visibility and space being tight, it’s not easy. The angle bar is set to the correct height below the centreline of the lathe setting pin plus 3⁄16 inch - a drill was used here. Fit the plate and just nip the fixing screws. This is where the tenon slot comes into play; you don’t need to think about that aspect of alignment. Next, a stub of 3⁄8 inch diameter material is put in the drill chuck (I have a good store of a lot of these in different lengths and diameters).
Now it’s possible just to feel for the correct position across the lathe and the top plate screws are tightened. A DTI here could be used but we already know the height above the centreline is correct so touch down on the top, note the setting, rotate the work 90 degrees and push the Tee gently until the same setting is achieved on the DTI, it not being necessary to rotate and check any more (but I bet a lottery winning ticket you do!). It just depends on the level of accuracy needed for the component; drilling and threading is then completed. The process for the long part ends is slightly different. This time a drill is inserted into the hole along the length drilled and the top clamps are tightened (photo 266).
This story is from the {{IssueName}} edition of {{MagazineName}}.
Start your 7-day Magzter GOLD free trial to access thousands of curated premium stories, and 9,000+ magazines and newspapers.
Already a subscriber ? Sign In
This story is from the {{IssueName}} edition of {{MagazineName}}.
Start your 7-day Magzter GOLD free trial to access thousands of curated premium stories, and 9,000+ magazines and newspapers.
Already a subscriber? Sign In
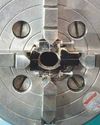
WORKSHOP TIP - Boring Eccentrics
I am making a 1 inch Minnie traction engine and have arrived at the machining of the eccentric straps.
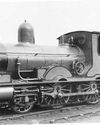
Wenford A 7¼ Inch Gauge 2-4-0 Beattie Well Tank
The stage has now been reached where the well tank body can be completed but beforehand there are some internal details to add.
Vertical Boiler Locomotives
Vertical Boiler Locomotives
Union Nuts, and How to Make Them
These are quite different from those commercially available and are made from copper
SHOWCASE Paul's Engine
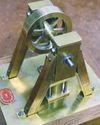
One day my son Paul came to me and asked if we could make something in my workshop, so that he could learn engineering processes.
CLUB NEWS
My secret’s out!

Building Dancer - The Boiler
Dancer needed a boiler that would be somewhat larger than the size permitted under the Model Engineering exemptions in the New Zealand regulations.

An Inverted ‘Ross Yoke' Watercooled Stirling Engine
As with all my hot air engines they are cheap to build, mostly from scrap
A Draught Proposal
A Draught Proposal
A Boiler Feed Pump
A Boiler Feed Pump